The correct distribution of vannamei shrimp fry is a crucial first step in determining the success of aquaculture. Proper fry distribution techniques can increase the number of surviving fry, resulting in a high survival rate (SR).
Fry are usually distributed when they reach PL10 to PL15. Additionally, they often need to undergo various tests to ensure their quality. During the distribution process, fry cannot be immediately released into the pond. Instead, it’s necessary to adjust the temperature first to prevent stress, which can lead to mortality. Read on to learn more about the proper and correct method for distributing Vaname shrimp fry.
Also Read: 7 Characteristics of High-Quality Vannamei Shrimp Seed
Characteristics of Good Fry
As one of the keys to successful Vaname shrimp cultivation, you must ensure that the fry to be distributed are of ideal quality. Here are some characteristics to look for:
1. Uniform Fry Size
Fry with uniform size indicate high quality. Uniform size suggests that the fry have grown normally and received consistent nutrition. Additionally, uniform fry size can prevent cannibalism.
2. No Physical Deformities
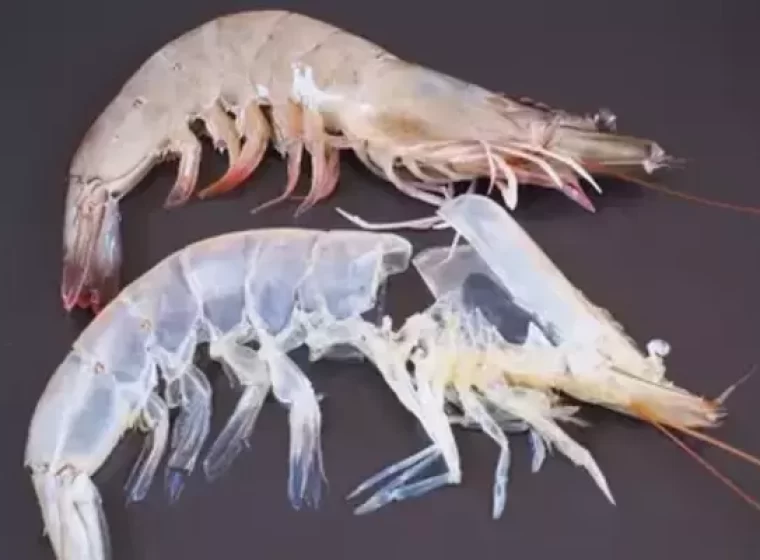
Healthy fry should have complete and well-developed body parts, including straight tails, perfectly shaped eyes and eye stalks, and intact swimmerets.
3. Full Gut Content
Healthy fry should have a full gut as an indication of good feeding. Conversely, fry with empty guts may mean they are not eating or are experiencing stress.
4. Active Fry Movement
Another sign of quality fry is their active and agile movement, which is assessed through activity tests. This is because fry are sensitive to external stimuli.
5. Free from Various Diseases
Shrimp diseases can be transmitted from broodstock to fry. Therefore, shrimp farmers must ensure that the fry are free from various pathogens through PCR testing.
6. Passes Stress Tests
Minimizing stress on fry is a top priority during the hatchery process. Stressed fry have a lower chance of survival.
7. Sourced from a Trusted Hatchery
To obtain the highest-quality fry, you should get them from a trusted hatchery. This ensures that the breeding process has been closely monitored to maintain quality.
Also Read: Vannamei Shrimp Feed Management Tips For Your Anti-Loss Cultivation
How to Distribute Vannamei Shrimp Fry
1. Choosing the Right Distribution Time
Before distributing vannamei shrimp fry, you must determine the appropriate time for their release. Typically, fry are distributed in the morning or evening when the air temperature is lower to minimize fry stress.
Also, ensure that the weather conditions are stable to prevent sudden changes in the pond water quality parameters.
2. Pond Preparation
Preparation of the aquaculture pond is a critical aspect of the vannamei shrimp fry distribution process. Ensure that the pond is free from various pests and pathogens that could harm the fry.
Additionally, check that the water parameters in the pond are within the optimal range, including pH, alkalinity, salinity, dissolved oxygen, and water temperature. If all these parameters are in the optimal range, you can start transferring the fry to the pond while keeping them in plastic bags to allow them to acclimate.
3. Fry Adaptation to Pond Water
After the pond is ready, you cannot simply release the fry directly. They need to go through an adaptation process to prevent sudden environmental changes that may stress the shrimp.
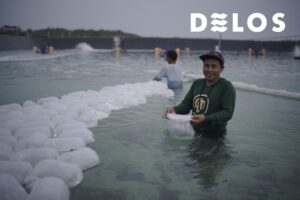
This adaptation is done by floating the bags containing the fry in the pond for 15-30 minutes. Then, open the bags, measure the salinity and temperature of the water inside the bags and in the pond. The temperature difference should not exceed 2 degrees Celsius, and the salinity difference should not be more than 5 ppt.
To expedite the adaptation, you can gradually add pond water to the bags until the temperature and salinity match.
4. Distributing Fry into the Pond
Once the fry have adequately adapted to the pond environment, you can release them into the pond. Adapted fry will exhibit active movement and swimming within the bags.
Fry can be released into the pond using two methods: the first involves slowly releasing them directly, and the second method involves adding Artemia (natural shrimp feed) first and then, after 30 minutes, releasing the shrimp through a tube using the force of gravity.
5. Initial Feeding (Blind Feeding)
After distributing the fry into the pond, provide appropriate initial feed to support their growth and survival. Blind feeding can be employed from day-old postlarvae (DOC 1) up to day-old postlarvae 30 (DOC 30).
Also Read: Do These 5 Things For Successful Vannamei Shrimp Cultivation
Things to Consider Before Seeding Shrimp Fry
1. Check Post-Larvae Documents
When post-larvae arrive at the pond location, it is advisable to check the completeness of documents related to post-larvae, including Specific Pathogen Free (SPF) or Specific Pathogen Resistant (SPR) specification letters. SPF indicates that the post-larvae are free from pathogens such as WSSV, TSV, and IHHNV viruses, while SPR indicates the post-larvae’s genetic resistance to these pathogens. Both documents prove that the hatchery has conducted thorough inspections with strict biosecurity measures before sending the post-larvae.
2. Ensure Pond Readiness
The second crucial step before seeding post-larvae is to ensure pond readiness. The preparation stage or Day of Preparation (DOP) must meet cultivation standards.
This involves checking pond water quality parameters, such as pH, dissolved oxygen (DO), temperature, and salinity, which must be in optimal conditions to support the postlarvae’s ideal growth.
3. Conduct Post-Larvae Sampling
Post-larvae play a key role in the success of shrimp cultivation. Therefore, before seeding, it is necessary to take samples to ensure that the incoming post-larvae are in ideal condition.
Sampling is done by taking at least 10% of the total ordered post-larvae, providing an overview of post-larvae quality without the need to seed all post-larvae, making it more efficient.
Also, perform a physical examination of the post-larvae, including necrosis and bolitas tests, conducted in the laboratory. The necrosis test aims to identify the number of dead cells or necrosis in the post-larvae organs, while the bolitas test involves changes in the form of balls in the hepatopancreas tissue, indicating abnormalities in the post-larvae organs due to travel stress.
4. Check Water Quality
Parameters for water quality testing include pH, temperature, dissolved oxygen (DO), and salinity. The goal is to assess the differences in water quality conditions for post-larvae after arriving at the location compared to when they were still in the hatchery. If there are differences, acclimatization may require more or less time depending on the suitability of water quality.
5. Calculate the Actual Number of Post-Larvae
Calculating the actual number of post-larvae is essential to determine the stocking density of the pond. If the number of post-larvae seeded exceeds the specified stocking density, it can impact the pond’s carrying capacity in the future. The calculation is done on the selected sample bags during the sampling, using tools such as large buckets, small buckets, hand tally counters, and scoops.
The process of counting live and dead post-larvae involves summing up the numbers to obtain the actual count, which can then be used to determine the appropriate stocking density according to the established guidelines.
Also Read: Factors Affecting Shrimp Survival Rate
Start Your Vannamei Shrimp Farming with DELOS!
These are the steps for distributing fry that you can practice when cultivating vannamei shrimp. The selection and distribution of ideal fry are crucial for optimizing shrimp production. To enhance your vannamei shrimp farming, you can choose DELOS as your shrimp pond cultivation partner.
DELOS is an aquatech company that can assist you in managing your ponds and achieving optimal productivity in every cycle. DELOS pond management is integrated with the AquaHero app, making it easy for you to monitor pond conditions daily.
Contact the DELOS team via contact@delosaqua.com or submit your inquiries through our contact form at www.delosaqua.com to learn more about our services. Start your vannamei shrimp farming journey with DELOS!


